This is my method using a tote for a sump & how to plumb it to any in-line pump.
Place your sump tote on a flat surface whether floor or table. Set your pump next to it where you want to connect them. I place either 2x4 wood topped with a thin piece of rubber (like a piece of tire inner tube) or styrofoam sheets under the pump so that it lifts the pump about 2 inches up. We want the pump elevated so that the 90 degree elbow intake we'll install inside the tote can clear the tote bottom & still intake water. Using rubber or styrofoam also absorbs any pump vibration & reduces noise.
With the pump elevated, butt the pump up against the tote & mark the tote around the pump intake so you know where to drill your hole in the sump.
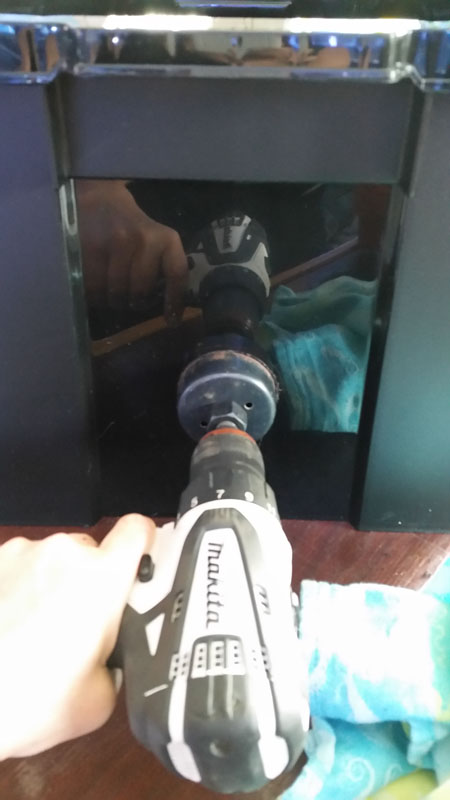
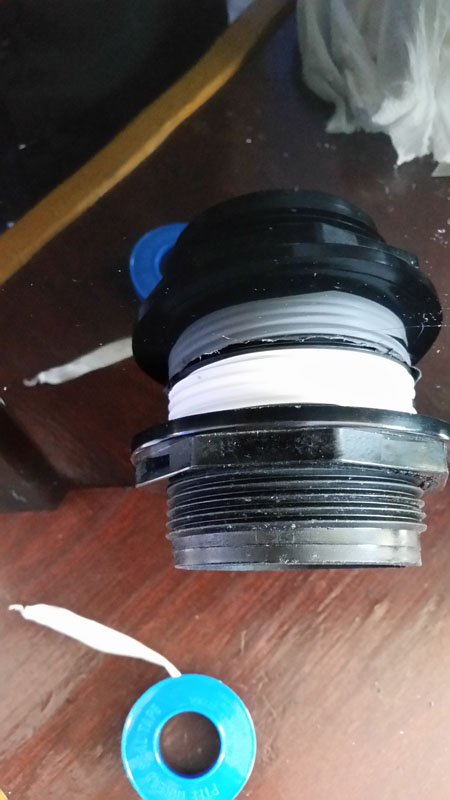
Using a hole saw the same diameter as needed for the bulkhead size you're installing, cut your hole, clean any burs with sandpaper to make the hole smooth then install your bulkhead with the head & rubber gasket inside the sump/wet side.
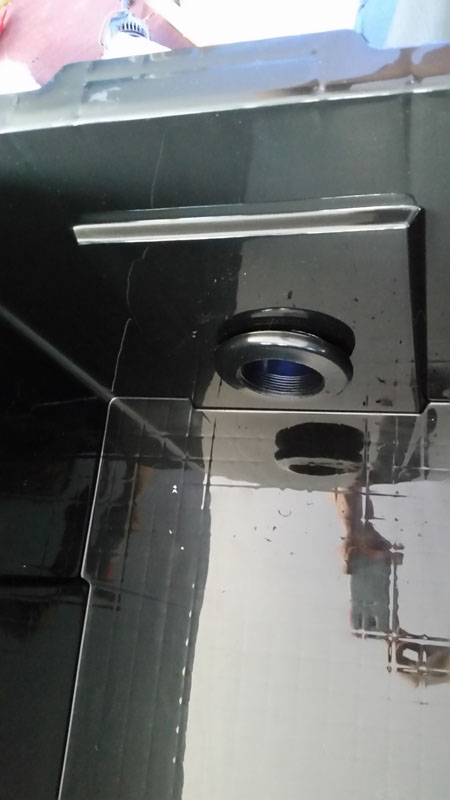
Use a wrap or 2 of Teflon tape on the outside threads at the head of the bulkhead so when you tighten the nut it's less likely to back off.
Now that your bulkhead is installed on the sump, let's finish the intake inside the sump.
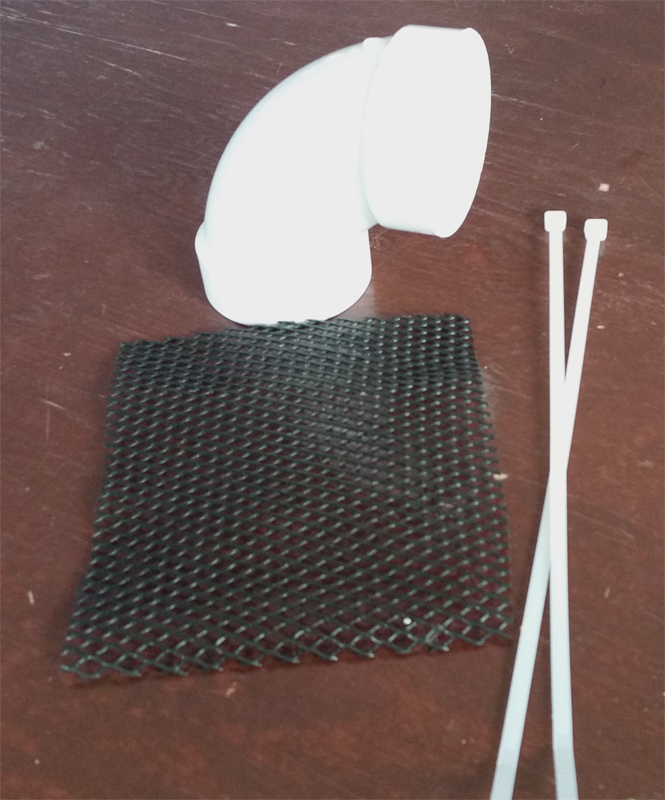
Parts Needed:
Male Threaded Adapter
Approx 3 inch piece of straight PVC pipe
90 degree PVC elbow
Plastic mesh netting & plastic Zip ties
Nothing about the sump inside intake needs gluing. In fact, you want to be able to turn the direction of your intake so keep everything just hand turn tight. More than likely your bulkhead has threads inside the head. Install the Male Threaded Adapter then the short piece of straight PVC pipe.
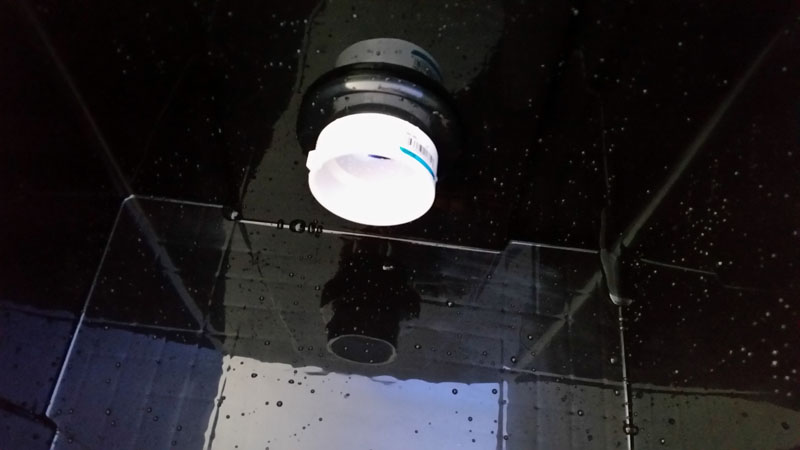
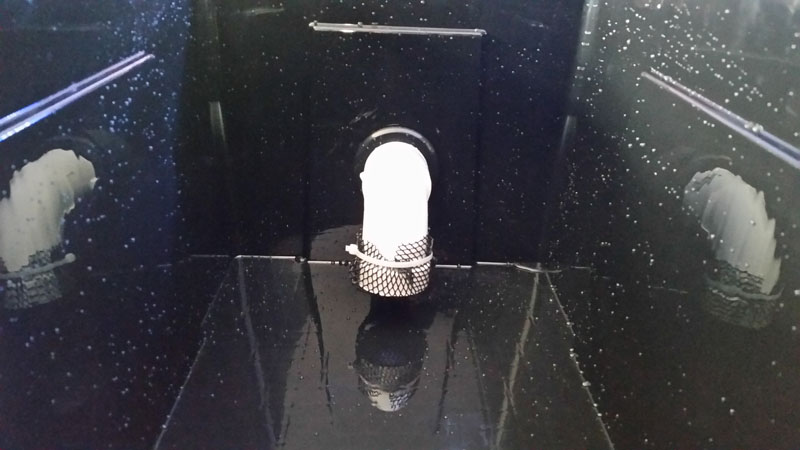
I like to protect my pumps by covering one/the intake end of the 90 degree elbow. I use a piece of plastic pond pump mesh bag cut large enough to be able to zip tie it onto my elbow. Be sure that whatever you use for a screen that it doesn't restrict the water intake & that it's totally saltwater safe.
Once the mesh is on you can now slide your elbow onto the straight PVC pipe sticking out of your bulkhead. OR, in my case pictured below, I inserted the PVC piece into the elbow first. Doesn't matter which way you do it. ;c) Again, no glue is used so you can freely turn the elbow if needed.

Here's mine installed & elbow positioned to draw water from the sump bottom.
Installing the sump's Ball Valve.
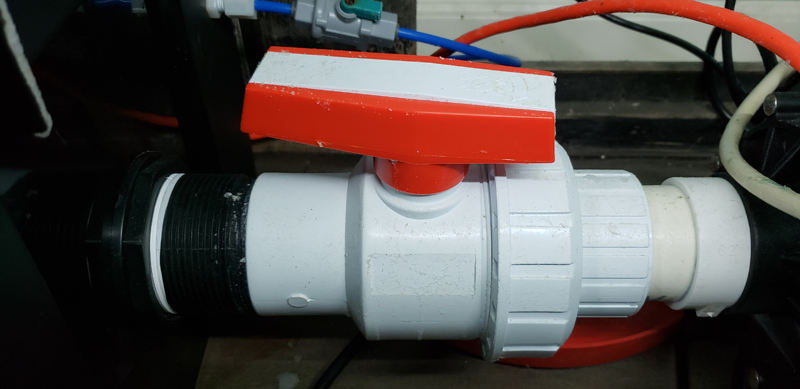
This valve is the same diameter as your pump's intake & is installed on the bulkhead tail outside of the sump. It is only ever used when we need to remove the pump off the sump. If we didn't have this valve we'd have to shut down the system & empty the sump of all water! Installing this ball valve will make pump maintenance a snap! On the dry side (outside) of your sump we will PVC cement all pieces. I use Oatey Heavy Duty found at Home Depot but it's clear so you might consider their 2 part PVC which is purple colored & you can see where you've applied it.
Cut a short piece of straight PVC pipe approx 3 inches & PVC cement it into the bulkhead tail. The other end you will PVC cement into the ball valve. In the picture above you can see how I managed to connect the valve to the bulkhead touching. There is a straight piece of PVC pipe in there! ;c) On the right end of the valve you can see I've used another short straight piece of PVC pipe which is cemented into the pump's intake male threaded adapter (pump instructions next). Note! Be sure your ball valve is installed with the handle near the sump - furthest away from the pump & the union end near the pump! Remember, this valve is used to stop water from coming out of your sump if you ever need to take your pump off the sump for maintenance etc. Also, keep this valve wide open always. We never want to restrict the intake of our pump - ever.
Readying the pump to attach to the sump's ball valve/intake
You will need the following:
1. 2 short pieces (approx 3-3.5" ea) of straight PVC pipe
2. Single Union Ball Valve (sold here - get the same size as your pump's discharge)
3. 2 Male threaded PVC adapters - be sure you have the right size for your pump - especially if the intake & discharge are different sizes!
4. Aquarium silicone
5. Pipe wrench
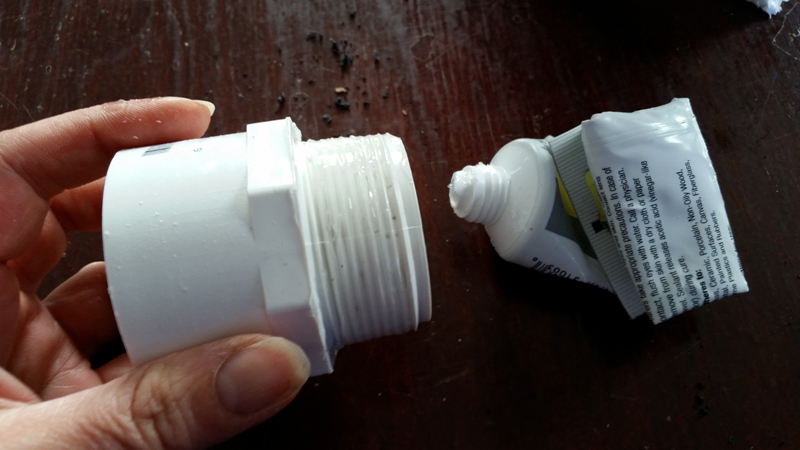
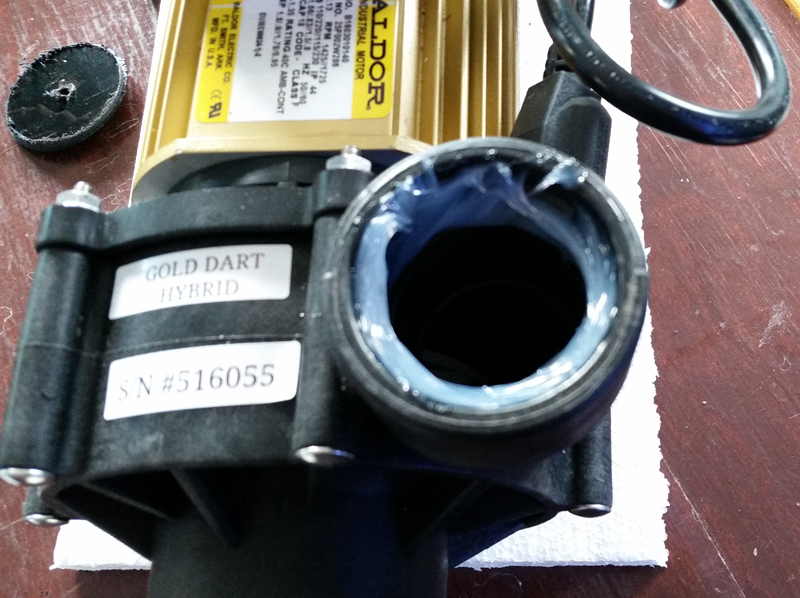
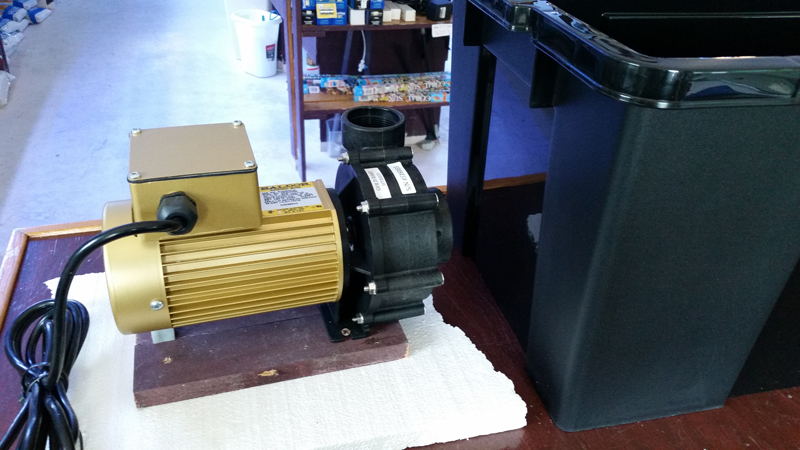
You will install a male threaded adapter in the pump's intake & discharge. Liberally apply aquarium silicone to the threads of the adapter & pump then install the adapter. Use the wrench to tighten until you get firm resistance. Do not over tighten! Read the pump's install instructions.
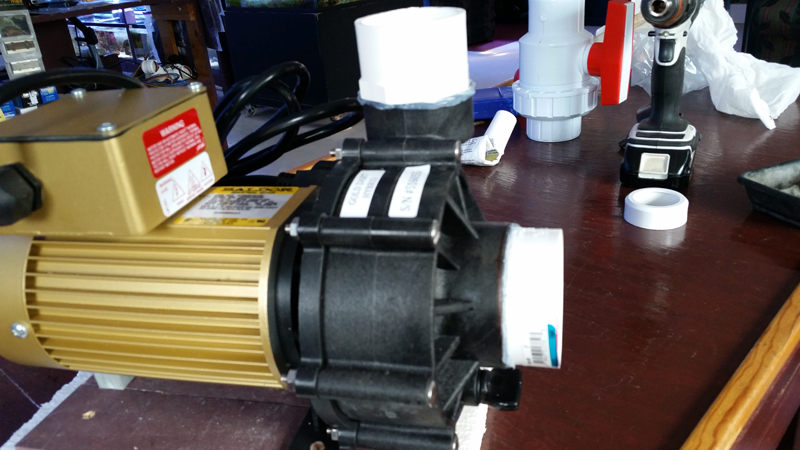
With the adapters installed on the pump we can now connect the pump to the sump's ball valve using a short piece of straight PVC pipe. PVC cement all pieces.
On the discharge adapter install another short piece of straight PVC pipe & attach your discharge ball valve. Again, remembering to install the valve with the handle away from the pump & the valve union nearest to the pump. Envision closing the valve so water can't come out if you need to remove the pump. This valve will also be used to control the overall speed of your water flow into the tank. Continue with straight PVC pipe to the back of your stand & install a PVC "T" to split the return flow into 2 directions (L & R behind your tank).
See "Pump Parts List" for a plumbing diagram & parts list.
Whether a 75g tank, 120g or 220g etc., all will be plumbed the exact same way.
This is Jay's 210g plumbing. It goes to a sump in his basement but could easily divert to a sump under the cabinet as shows in the next pic below this.
Smaller PVC pipe is 1" & is the return from the pump.
Larger 2" PVC pipe is the dump from the overflow box sets which connect via 2" PVC drain T's - slightly pitched down as this is a gravity feed dump. Note ... be sure your drain T's are all facing the same & right direction to the sump! :c)
The grey colored PVC pipe off the bottom of the overflows are PVC cemented into the top of the 2" drain T's which have a 1.5" to 1" reducer PVC cemented in them.
The picture below is showing you the sump & plumbing for a large 220g tank using a submersible pump. Again, the pump plumbing would be the same for a 75g & up. For this article, focus on the RED arrows which are the water flow coming from the submersed pump up & through the split return PVC pipes. Pictured below the pump uses 1" PVC pipe (again, noted with red arrows).
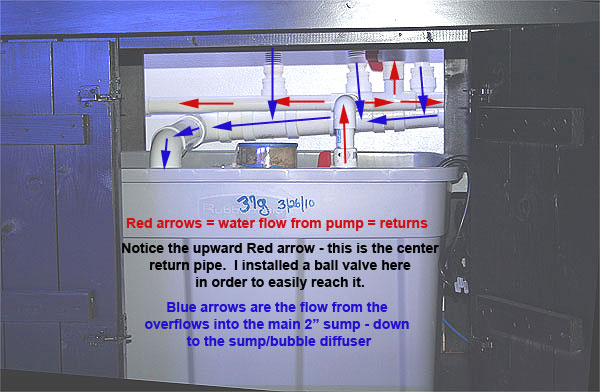
To plumb a submersible pump I set the pump physically inside the sump - as far to one end of the sump I can get it. This is to keep the pump away from the bubble making area which will be your bubble diffuser & skimmer area which should be located on the opposite end of your sump! Be sure to position it so it can freely intake water! Give the pump intake a few inches away from any obstruction like your sump wall.
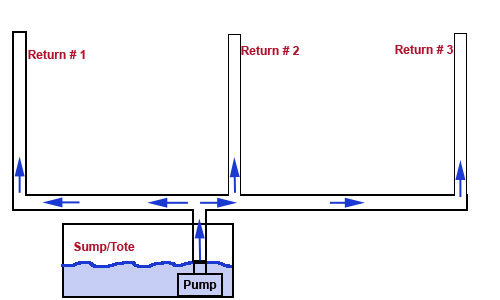
For both submersible & external pumps: Depending on the discharge connector type on your pump (some have internal threads or external threads) you will need to end up with a fitting that is a slip end to install your first piece of straight PVC pipe. Internal thread will need a female PVC adapter which should be secured with aquarium sealer or GE 100% silicone (do not use other sealers as they contain harmful chemicals!). If an external thread, use a male PVC adapter. You can also use a PVC union to easily remove your pump from the plumbing pipes when service is needed. Next, you will install your main discharge ball valve so figure out where you want your ball valve located & cut your straight PVC pipe to the length to achieve this. Once the ball valve is in you will use another straight piece of PVC pipe to connect to a 90 degree elbow to turn the water flow to the back of your tank. The next piece of straight PVC pipe will end with a PVC "T" connected at the end so the water flow will be split into 2 streams (flowing left & right) horizontally behind your tank. You will need to install another "T" as close to the center of your tank as possible to create a center "Return" for the tank. Then you will continue on both left & right with straight PVC until you reach both tank ends where you will install a 90 degree PVC elbow to turn the water flow up/vertical. At the top of both these elbows you will install a PVC reducer to decrease the PVC pipe size. Example: Starting with 1 inch PVC from the pump we will reduce to 3/4". Starting with 1.5" will reduce to 1" etc.
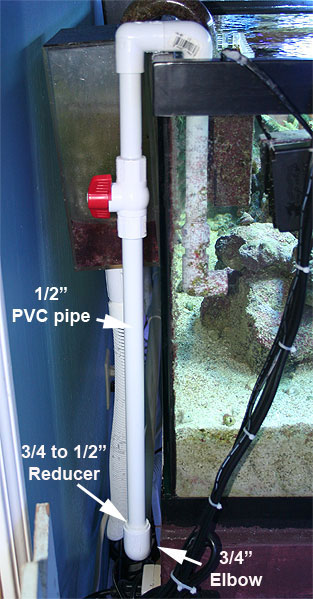
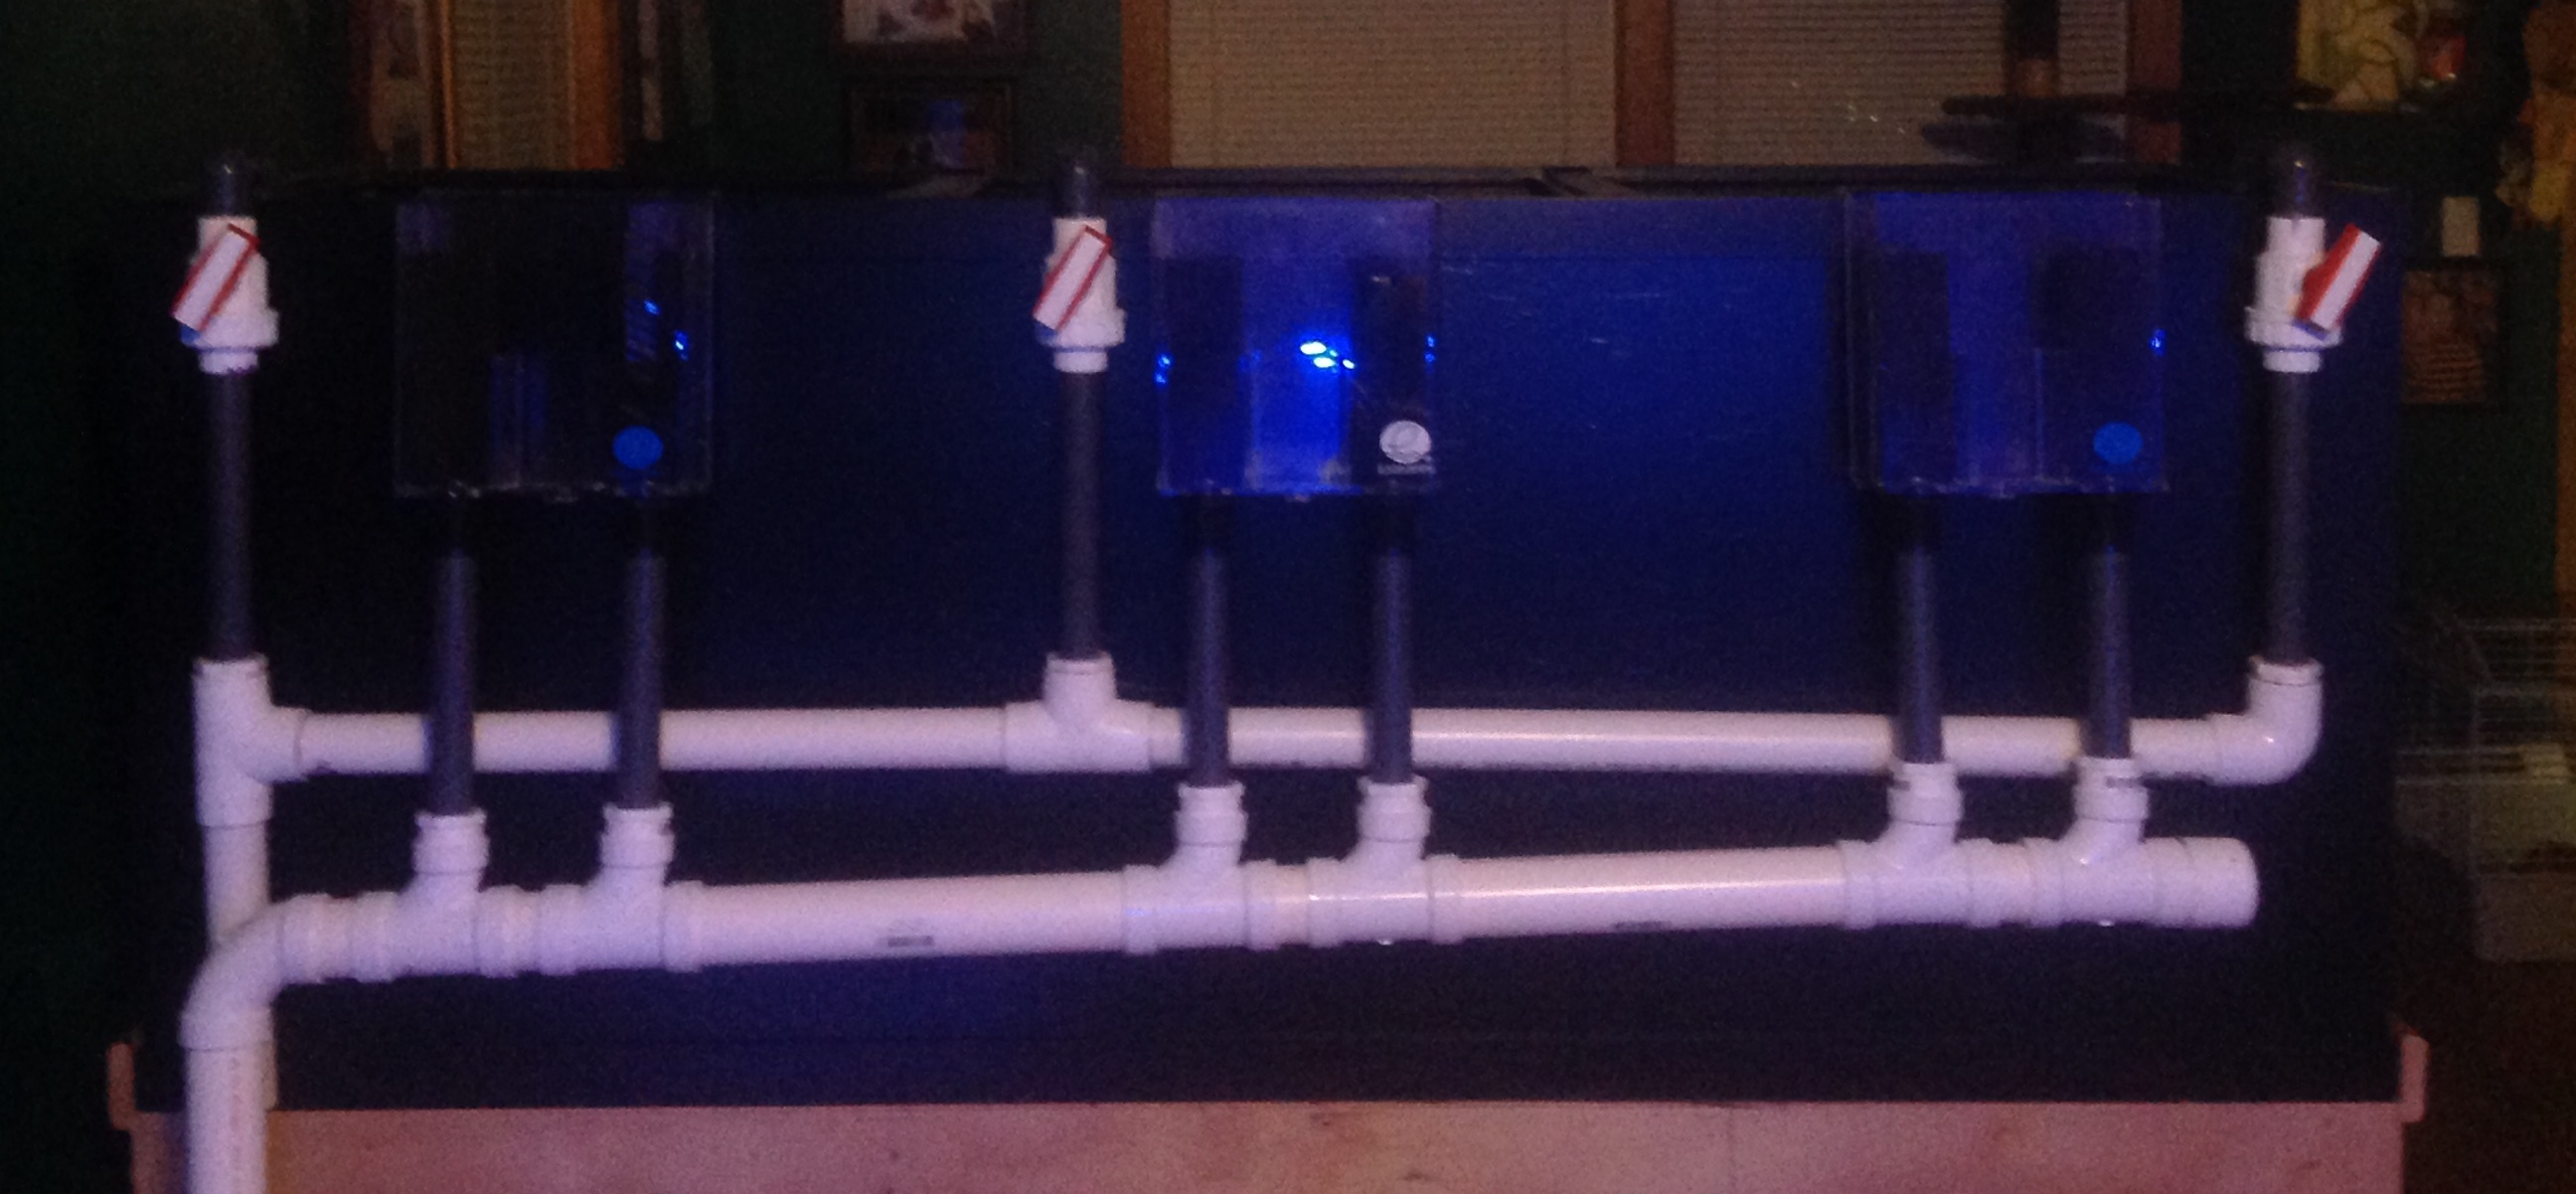
The vertical return plumbing - we need to install a ball valve on all 3 returns (note the red handle in the picture). This will allow us to control how much water is coming out of them. Understand that the closest return to the pump will receive the strongest water flow so it's important to have control over the flow & reduce or increase as needed by opening or closing a return valve. Note: I like to install my center ball valve down low to the sump area (seen in the top pic here) as I find it difficult to reach it over the tank top! Once set at a flow rate you want we rarely have to adjust them again so no worries!
When the outside of tank plumbing is done it will flow like this...
Next ... Building the "inside tank" portion of the "Returns". Click here for a printable "Parts List" & diagram.
Your Cart
Login Form
Visitor Hours:
Walk-Ins
Saturday's
Noon to 3pm
See "What's New"
below for more info.
Newsletter
Reviews
-
A vendor who cares!
I just received my first order from AquaCorals. I have never been so impressed. The ...
Steven Reavis · Reviews · 1 months ago
